Physical Address
304 North Cardinal St.
Dorchester Center, MA 02124
Physical Address
304 North Cardinal St.
Dorchester Center, MA 02124

Turn PowerPoint into video projects have become increasingly popular among marketers, educators, business owners, and content creators. What many people don’t realize is that PowerPoint is no longer just a presentation tool. With the right approach, it can also become a powerful video creation platform capable of producing professional-looking content for marketing, training, sales, and social media.
Many businesses invest in expensive video software when they already have a tool capable of creating engaging animated videos right on their computer.
If you already know how to create PowerPoint slides, you’re much closer to producing videos than you might think.
In this guide, you’ll learn seven practical steps to transform ordinary PowerPoint presentations into professional videos that look polished and engaging.
Most people associate PowerPoint with meetings and presentations, but the software offers far more capabilities than many users realize.
Today, many professionals use it to turn PowerPoint presentations into engaging videos for marketing, training, and educational purposes.
Modern versions of PowerPoint include:
These tools make it possible to turn PowerPoint into professional video content, including promotional videos, educational materials, product demonstrations, company introductions, and training resources, without learning complicated editing software.
For beginners, PowerPoint provides a familiar environment that significantly reduces the learning curve. This makes it easier to turn PowerPoint into a professional video while maintaining full control over design, branding, and messaging.
Before you turn PowerPoint into a professional video, determine the purpose of your project.
Ask yourself:
A clear objective helps guide every design and content decision throughout the project. When you turn PowerPoint into video content with a specific goal in mind, it becomes much easier to create a focused and engaging message.
Videos with a specific purpose tend to perform much better than videos that attempt to communicate too many messages at once.
Many presentations are created for live audiences, not video viewers.
When turn PowerPoint into video content, simplicity becomes even more important.
Focus on:
Remember that viewers may watch on mobile devices where small text becomes difficult to read.
Clean and simple slides almost always outperform overcrowded designs.
Visual quality plays a major role in how professional your final video appears.
Whenever possible, use:
Poor-quality visuals can make even valuable content appear unprofessional.
Think of each slide as a scene in your video rather than a traditional presentation slide.
Every visual should support your message and help maintain audience attention.
One of the biggest mistakes beginners make is overusing animations.
While PowerPoint offers many animation effects, using too many can make a video feel distracting and outdated.
Instead, focus on:
Professional videos often use fewer effects rather than more.
The goal is to guide the viewer’s attention, not overwhelm them with constant motion.
A well-recorded voiceover can significantly increase engagement and improve message clarity.
PowerPoint allows users to record narration directly within the presentation.
When recording:
Voice narration helps transform static slides into a complete video experience and can improve viewer retention.
If narration isn’t necessary, background music can also help create a more polished presentation.
Once your slides, animations, and narration are complete, PowerPoint allows you to export the entire presentation as a video file.
Most users choose MP4 format because it works well across various platforms.
Before exporting, double-check:
Taking a few minutes to review your project can prevent mistakes that might otherwise require re-exporting the video later.
Different platforms often require different video formats and dimensions.
For example:
Consider where your audience will watch the video and optimize accordingly.
Small adjustments to formatting can improve visibility and engagement significantly.
Creating professional PowerPoint videos becomes much easier when you start with a well-designed template.
If you’d rather skip the design process and focus on customization, check out my collection of:
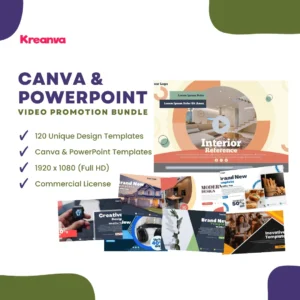
This premium bundle includes professionally designed video templates suitable for:
Instead of spending hours building layouts from scratch, you can simply customize the templates with your own content and start producing professional marketing videos faster.
Whether you’re a freelancer, agency owner, marketer, or business owner, having a library of ready-made templates can save significant time and effort.
👉 [CHECK FULL PRODUCT CANVA VIDEO PROMOTION]
PowerPoint has evolved far beyond traditional presentations.
With the right design approach, thoughtful animations, and clear messaging, you can turn PowerPoint into a professional video creation tool that delivers impressive results.
You don’t need expensive software or advanced editing skills to produce professional-looking content.
By following these seven steps, you’ll be able to turn PowerPoint into a professional video, create more polished content, communicate your message effectively, and support your marketing or business goals.
And if you’re looking to accelerate the process even further, professionally designed templates can provide a strong foundation for creating engaging videos in a fraction of the time.